Guide
How Long to Cook Bacon: Oven, Pan and Air Fryer Times for Perfect Results
This page contains affiliate links – if you buy through them we may earn a commission, at no extra cost to you. The recommendations are our own assessment. As an Amazon Associate we earn from qualifying purchases.
Bacon timing depends on three things: the cut thickness, the heat source, and how crispy you want it. Undershoot and you get limp, rubbery strips. Overshoot and the fat burns bitter. This guide sets out times for the three most common methods — oven, pan and air fryer — so you can hit your preferred doneness without guesswork.
Bacon Thickness: Why It Changes Everything
Bacon is sold in three common thicknesses, and each one cooks at a different rate. Thin-cut (also called restaurant-style) is roughly 1.5 mm per slice. Regular-cut runs about 2–3 mm. Thick-cut (sometimes labeled butcher-cut) is around 4–5 mm. The thicker the slice, the longer it needs — but thick bacon also gives you a wider window between chewy and burnt, making it more forgiving for beginners.
Cold bacon placed in a cold pan or oven renders fat more evenly than bacon dropped onto a screaming-hot surface. This is especially true for thick-cut. Starting cold lets the fat melt out gradually, which crisps the lean parts without charring them.
- Thin-cut: ~1.5 mm — cooks fastest, goes from done to burnt in under a minute
- Regular-cut: ~2–3 mm — the most common; the times in this guide default to regular unless noted
- Thick-cut: ~4–5 mm — needs 30–50% more time than regular; much more forgiving on the high end
Oven-Baked Bacon
The oven is the most hands-off method and handles large batches cleanly. Line a rimmed baking sheet with parchment paper or aluminium foil, arrange strips in a single layer without overlapping, and place the tray on the centre rack. No preheating is necessary — starting in a cold oven renders fat more gently and produces more even results.
Set the oven to 200 °C (400 °F). From a cold start, regular-cut bacon takes roughly 18–22 minutes total. Thin-cut finishes in 14–18 minutes. Thick-cut needs 22–28 minutes. Check at the low end of the range — ovens vary, and the bacon continues to crisp slightly as it cools on the tray.
For extra-crispy results, place a wire cooling rack on the baking sheet so the strips sit above the rendered fat. This lets air circulate underneath and crisps both sides evenly.
- Temperature: 200 °C / 400 °F (cold start recommended)
- Thin-cut: 14–18 minutes
- Regular-cut: 18–22 minutes
- Thick-cut: 22–28 minutes
- No flipping needed — the indirect heat cooks both sides
- Let strips rest on the tray for 2 minutes; they firm up as fat sets
Pan-Fried Bacon (Stovetop)
The stovetop gives you the most control over doneness but requires attention. Place bacon strips flat in a cold pan — cast iron, stainless steel, or non-stick all work. Set the heat to medium-low and let the fat render slowly. Once the fat starts pooling, raise the heat to medium.
Flip the strips every 2–3 minutes. Regular-cut bacon is typically done in 8–12 minutes total, depending on your stove and the doneness you want. Thin-cut finishes in 5–7 minutes. Thick-cut takes 12–16 minutes. The visual cue matters more than the clock: look for the lean meat turning a deep reddish-brown and the fat becoming translucent and golden.
Drain finished strips on a plate lined with paper towels. If you are cooking in batches, pour off excess fat between rounds but leave a thin coating in the pan — this prevents sticking and adds flavour to the next batch.
- Start cold, heat to medium-low, then raise to medium once fat renders
- Thin-cut: 5–7 minutes total, flipping every 1–2 minutes
- Regular-cut: 8–12 minutes total, flipping every 2–3 minutes
- Thick-cut: 12–16 minutes total, flipping every 3 minutes
- Do not crowd the pan — overlapping strips steam instead of crisping
- Cast iron retains heat best and gives the most even browning
Air Fryer Bacon
The air fryer cooks bacon quickly with minimal mess, but basket size limits batch volume. Lay strips in a single layer in the basket or on the tray — slight overlap at the edges is fine since the strips shrink, but stacking is not. Preheat is optional; most air fryers reach temperature within a minute.
Set the air fryer to 190 °C (375 °F). Regular-cut bacon takes 7–10 minutes. Thin-cut finishes in 5–7 minutes. Thick-cut needs 10–13 minutes. Check halfway through and rearrange if any strips are browning unevenly. The circulating air crisps both sides, so flipping is not strictly necessary, but a single flip at the halfway point improves evenness.
Empty the grease from the drip tray between batches. Accumulated fat can smoke at high air fryer temperatures and leave a burnt taste on later batches.
- Temperature: 190 °C / 375 °F
- Thin-cut: 5–7 minutes
- Regular-cut: 7–10 minutes
- Thick-cut: 10–13 minutes
- Single layer only — stacking causes uneven cooking
- Check and rearrange at the halfway point for even browning
- Empty drip tray between batches to avoid smoking
Chewy vs. Crispy: Adjusting for Doneness
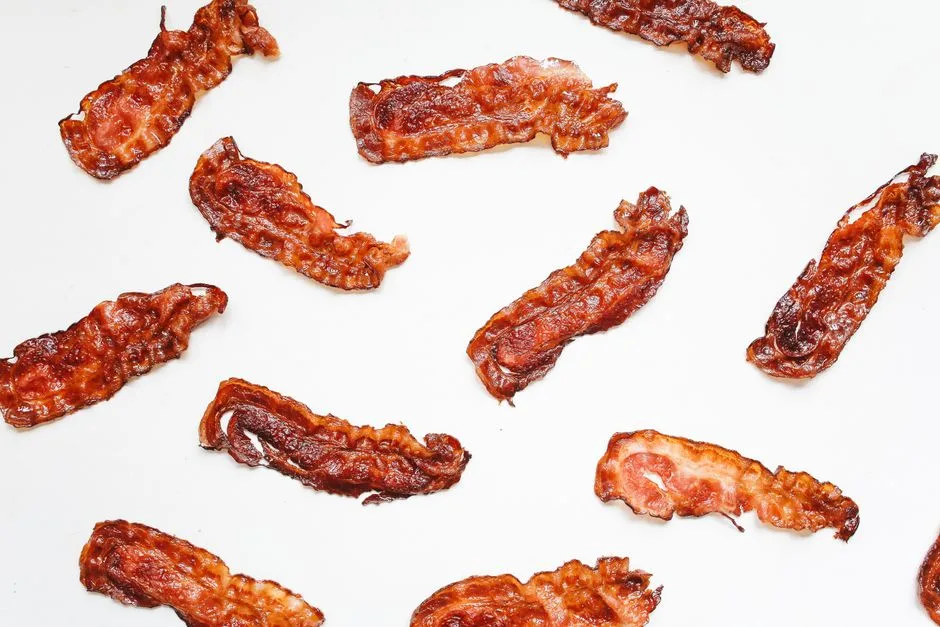
Personal preference is the real variable. The times above land in the middle — a strip that bends without snapping, with fat that is rendered but not glassy. If you want chewy bacon, pull it 1–2 minutes earlier. If you want shatteringly crispy bacon, add 2–3 minutes — but watch closely, because the window between crispy and burnt narrows fast once the moisture is gone.
Bacon continues cooking after you remove it from heat. The residual fat stays hot enough to firm the strip further as it cools. If your goal is crispy, pull the bacon when it still looks barely underdone — it will reach the snap stage on the plate.
- For chewy: subtract 1–2 minutes from the listed times and remove while strips still flex easily
- For crispy: add 2–3 minutes but monitor constantly — burnt fat turns bitter quickly
- Carryover cooking firms the strips further as they rest and cool
- Blotting on paper towels removes surface fat and speeds the crisping effect
Common Mistakes That Ruin Bacon
Most bacon failures come from impatience or overcrowding. High heat from the start is the single biggest mistake — it burns the outside before the fat renders, leaving you with charred edges around chewy, fatty centres. Low and slow first, then finish with heat if you want extra crispness.
Overcrowding traps steam. Whether in a pan, oven tray or air fryer basket, strips that overlap cook unevenly because the moisture they release cannot escape. Better to cook two quick batches than one crammed one.
- Starting too hot — renders fat unevenly and burns lean meat
- Overcrowding — trapped steam prevents crisping
- Not draining fat between batches — causes smoking and off-flavours
- Pressing strips flat with a spatula — squeezes out moisture unevenly and causes splatter
- Ignoring carryover — pulling bacon at your target doneness means it will overcook by the time you eat it
Saving and Reusing Bacon Fat
Rendered bacon fat is a cooking ingredient worth keeping. Strain it through a fine-mesh sieve or cheesecloth into a heat-safe jar while still warm. Stored in the refrigerator, it keeps for several months. It is excellent for roasting vegetables, frying eggs, or making cornbread.
Discard fat that has burned or turned dark brown — it will carry a bitter, acrid flavour into anything you cook with it. Clean, golden-amber fat is what you want.
- Strain while warm through a fine sieve to remove solid bits
- Store in the refrigerator in a sealed jar for up to three months
- Do not pour fat down the drain — it solidifies and clogs pipes
- Discard any fat that smells burnt or is very dark in colour
Frequently Asked Questions
Do I need to flip bacon in the oven?
No. The indirect, surrounding heat of the oven cooks both sides evenly. Flipping is unnecessary and risks tearing the strips. If you want extra crispness on both sides, use a wire rack on the baking sheet so air reaches the underside.
Can I cook bacon from frozen?
Yes, but it takes longer and the results are less even. Frozen strips are difficult to separate, so it helps to thaw them just enough to peel apart — about 5 minutes at room temperature. If cooking from fully frozen, add roughly 50% more time and expect some uneven spots.
Why does my bacon curl in the pan?
Curling happens because the lean meat shrinks faster than the fat when hit with high heat. Starting in a cold pan over low heat reduces curling significantly. Some cooks also score the fat edge with shallow cuts every few centimetres to relieve tension.
Is bacon safe to eat if it is still pink?
Commercial bacon is cured with salt and nitrites, which preserve a pink colour even when fully cooked. Unlike raw pork, the colour of cooked bacon is not a reliable indicator of doneness. Texture and fat rendering are better cues — the lean should be firm and the fat should be translucent, not white and rubbery.
What temperature should bacon reach internally?
Bacon is a thin, cured product, so internal temperature measurement is impractical with a standard thermometer. Food safety agencies recommend cooking pork to 63 °C (145 °F), but most people cook bacon well past that for texture reasons. If the fat is rendered and the lean is firm, it is cooked through — bacon is cured, and it passes 63 °C (145 °F) well before it reaches the texture most people want, so doneness in bacon is a texture call, not a safety one.
How do I stop bacon from splattering?
Splatter is caused by water in the bacon hitting hot fat and flashing to steam. Starting in a cold pan and keeping the heat at medium reduces it substantially. A mesh splatter screen placed over the pan catches most of what remains without trapping steam the way a solid lid would.
Source for every safe minimum temperature on this page: the USDA Food Safety and Inspection Service safe minimum internal temperature chart, https://www.fsis.usda.gov/food-safety/safe-food-handling-and-preparation/food-safety-basics/safe-temperature-chart . Doneness temperatures above the safe minimum are a matter of preference, not safety.
Related guides